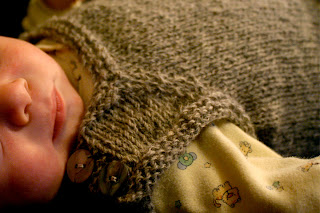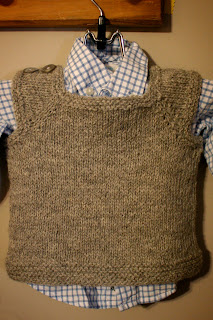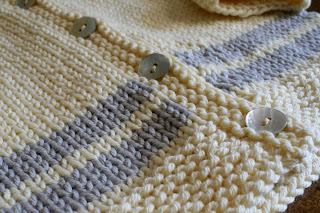
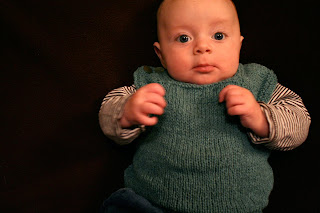
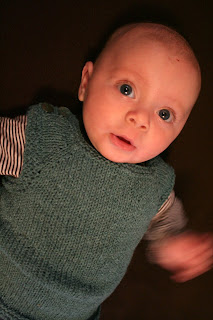
After a few adjustments I think the pattern is ready! Milo wore the vest all day after our wee photo shoot and it was perfect for this weather plus it really stayed in place. Vests are great over onesies and add that extra bit of warmth without bulk. I don't think the pattern is hard but you do need to be familiar with working in the round and raglan increases. I'm a lazy knitter and don't like seaming. Also working in the round allows you to size as you go - for instance, you can make the body as long as you want here (we all know some babies have long torsos, or tire-sized bellies like my guy). The pattern would be a lot easier if there wasn't a buttoned shoulder, but at this age I like the extra space for getting clothes over a tender noggin'. I've tried to be as clear as possible, but if anyone has questions or suggestions or finds a mistake, please let me know!
Baby T-Shirt Vest
You will need:
DK wool, approx 130yds (I used 1 skein of Elsebeth Lavold’s Silky Tweed)
4.5mm needles (16” circ and DPNs)
8 stitch markers ("pm" in pattern stands for place marker)
3 lengths of scrap yarn (for holding stitches)
2 buttons
Gauge 20 stitches over 32 rows = 4” square
Size is roughly 6-9 months, finished dimensions are: 9″ wide, 10” long (or longer – the body is up to you!)
YOKE
CO 68
R1: K8, pm, K1, pm, K18, pm, K1, pm, K12, pm, K1, pm, K18, pm, K1, pm, K8
R2: (increase row) *K to 1 stitch before marker, KFB into this stitch, slip marker, K1, slip marker, KFB into next stitch* repeat until last marker, slip marker, KFB into next stitch, K to end
R3: K all stitches
R4: (increase row) *K to 1 stitch before marker, KFB into this stitch, slip marker, K1, slip marker, KFB into next stitch* repeat until last marker, slip marker, KFB into next stitch, K to end
R5: K all stitches
R6: K4, P until 4 stitches remain, K4
R7: (increase row with buttonhole) K1, K2tog, yo *K to 1 stitch before marker, KFB into this stitch, slip marker, K1, slip marker, KFB into next stitch* repeat until last marker, slip marker, KFB into next stitch, K to end
R8, R10, R12: K4, P until 4 stitches remain, K4
R9, R11, R13: (increase row) *K to 1 stitch before marker, KFB into this stitch, slip marker, K1, slip marker, KFB into next stitch* repeat until last marker, slip marker, KFB into next stitch, K to end
R14: (buttonhole row) K4, P until 4 stitches remain, K1, yo, K2tog, K1
R15: (increase row) *K to 1 stitch before marker, KFB into this stitch, slip marker, K1, slip marker, KFB into next stitch* repeat until last marker, slip marker, KFB into next stitch, K to end
R16: K4, P until 4 stitches remain, K4
Break yarn (you have ended on WS). 124 st.
Next step, joining in the round. This looks tricky, but essentially the stitches on scrap yarn are the tops of the armholes and the CO stitches are the bottoms, which along with the regular stitches create the body of the vest. Once you join, you get to do some mindless knitting in the round – perfect for watching a movie with!
BODY
Here’s the set-up:
Place the first 16 stitches on scrap yarn. Start with vest yarn again and K32, turn work and continue in st st for 6 more rows (ending on the right side). Break yarn. Place the next 28 stitches on scrap yarn. Start with vest yarn again and K32, turn work and continue in st st for 6 more rows. DO NOT break yarn, but place the remaining 16 stitches on scrap yarn. With your vest yarn (that you have not broken!) CO15 stitches and continue knitting across the next 32, CO 15, and knit across the next 32. You have now joined the body and can keep knitting. For this size, I knit about 6” of st st before I started the bottom band.
If you haven’t CO stitches in the middle of a project before, there is a good tutorial here.
BOTTOM BAND
When you are ready to start the band, remember that you are knitting in the round and will need to alternate purl and knit rows. You may want to place a marker to remind you where to switch. Do at least 8 rows of purl and knit and bind off purlwise.
LEFT ARMHOLE (the buttoned/open side)
Transfer first 16 stitches on scrap yarn onto your needle, using vest yarn pick up 12 stitiches to get you to the middle of the armhole, pm, pick up another 12 stitches (24 stitches in total) and break yarn. Transfer the remaining 16 stitches from scrap yarn onto your needle – you now have 56 stitches on your needle.
With the wrong side facing you, join yarn.
R1: knit.
R2: knit to 3 stitches before marker, K2tog, KI, slip marker, K1, K2tog, knit to end.
R3: knit.
R4: knit to 4 stitches before marker, K2tog, K2, slip marker, K2, K2tog, knit to end.
R5: BO all stitches.
RIGHT ARMHOLE (knit in the round)
Place all 28 stitches from scrap yarn onto 2 DPNs. Determine the bottom center of the armhole and start picking up 12 stitches from this point until you reach the first DPN. Knit across all 28 stitches and then pick up another 12 until you meet up with where you started. PM.
R1: purl.
R2: K1, K2tog and knit to 3 stitches before marker, K2tog, KI.
R3: purl.
R4: K2, K2tog and knit to 4 stitches before marker, K2tog, K2.
R5: BO all stitches purlwise.
Weave in the loose ends and you’re done. No seams to finish, hooray!


